Loud pedal calibration (LPCAL) calibrates Spirio to the damper "contact point" of the piano. This allows the Spirio to accurately reproduce captured performances. It is critical to run LPCAL during each service visit.
Adjusting Loud Pedal Solenoid Actuate Distance
Note: Correct damper timing and damper lift are critical to the operation of the Loud Pedal Solenoid. If these need adjustment please refer to the Steinway Damper Manual
1. Check to see that the damper tray is resting on the loud pedal solenoid trapwork dowel (pitman) and not the foot powered trapwork dowel (pitman). To be sure, lower the sustain pedal rod nut so that there is 1-2 millimeters of lost motion between the foot powered dowel and the damper tray.
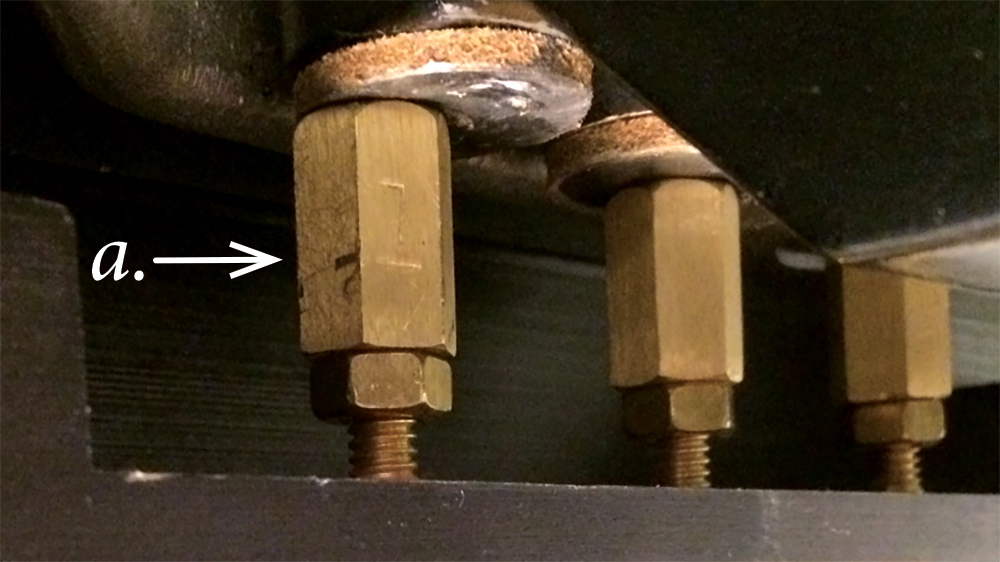 a. sustain pedal rod nut
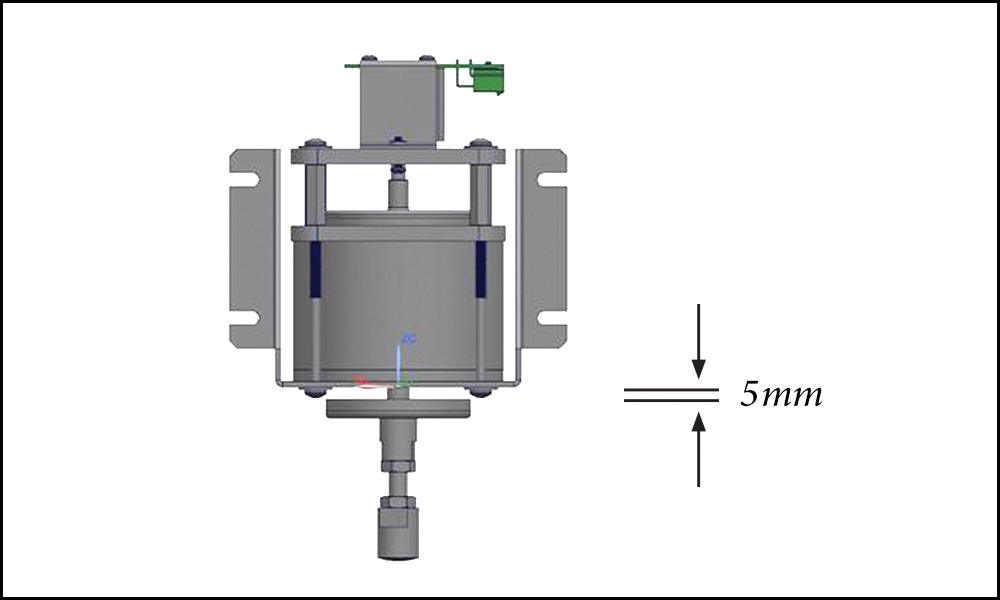
2. Set the actuate distance of the Loud Pedal Solenoid to 5mm. To adjust, loosen the lock-nut adjacent to the release stop disk and turn stop disk clockwise to decrease actuate distance or counterclockwise to increase actuate distance.
Note: An actuate distance greater than 5mm can cause damper thumping noise during playback. Do not exceed 5mm of actuate distance.
Use two 1/2 inch wrenches to adjust the nuts on the pedal solenoid.
Loud pedal solenoid actuate distance
Solenoid at rest
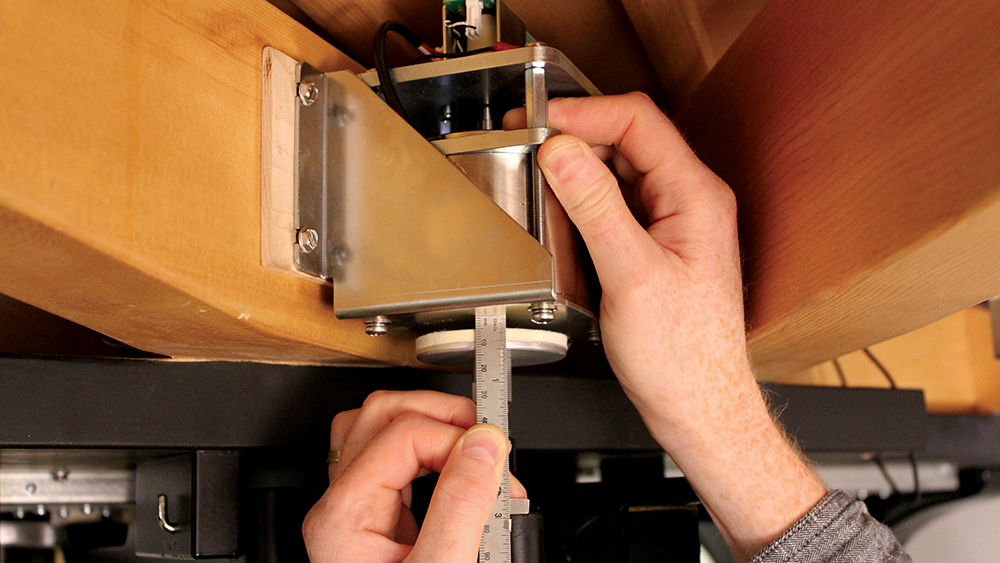
Use your hand to pull down on the top of the actuate stop disk and measure 5mm between the release stop felt and the mounting bracket.
Preliminary Setting of Black Pusher Tip
Set the black pusher tip position so that there is approximately 1.5mm of lost motion between the damper underlever tray and the damper underlevers. To adjust, loosen lock nut adjacent to the pusher tip and turn pusher tip to desired position.
Always tighten lock nut back down against pusher tip.
Final Setting of Black Pusher Tip
1. Run LPCAL command: press and release MODE, then press and release RIGHT arrow in quick succession (MODE/RIGHT).
2. The yellow LED will illuminate on the sensor/status panel. Then the solenoid will travel slowly to its fully-actuated position and back again as it measures its travel. The yellow LED will flash for a few seconds, as the calibration is stored in memory.
3. The solenoid will again travel to its fully-actuated position and back, but this time it will stop at the Damper Contact Point (see below), which is exactly 1/3 (one third) the distance of its full travel. The green LED will now remain illuminated.
Damper Contact Point: the point at which the damper felts are just starting to leave the strings.
Because this location will vary from piano to piano, it cannot be automated and must be done by ear.
4. To verify the correct Damper Contact Point, play 4 adjacent notes loudly and staccato in the middle of the keyboard (i.e. notes C, D, E & F) and listen for about 1 second of damper ring-through.
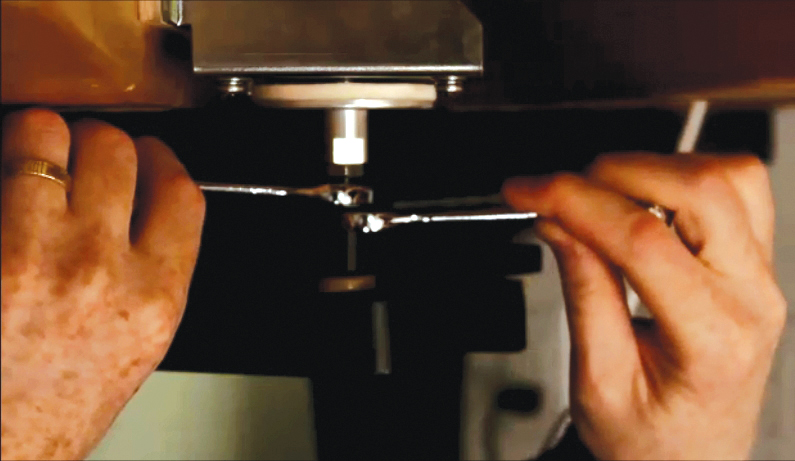
5. To increase or decrease the damper ring-through time, using 1/2 inch wrenches, release the pusher tip from the lock nut and turn the pusher tip up or down accordingly.
Only do this while the solenoid is being held at the Damper Contact Point (Green LED will be illuminated).
When the correct 1 second of damper ring-through is achieved, tighten the lock nut down against the black pusher tip.
6. Press OK to save the calibration. The solenoid will gently return to its rest position, and Spirio will return to normal playback mode.
7. Verify there is still approximately 1.5mm of lost motion between the damper tray and damper underlevers by pulling down on the actuate stop disk near the top of the solenoid and feeling the point at which the damper tray contacts the damper underlevers. It will feel like a slight bump.
8. Make sure to secure both lock nuts on the pusher tip and stop disk. Be careful not to change the pusher tip position when tightening lock nuts.
9. Use songs from the Technician Playlist to check loud pedal calibration.
- Clair de lune, listen to the first 30 seconds. If the performance is too “dry”, the black pusher tip needs to be lowered, thus increasing ring-through time of the Damper Contact Point.
- Mazurka in A flat major, listen to first 20 seconds. If the performance is too “wet”, the black pusher tip needs to be raised, thus decreasing ring-through time of the Damper Contact Point.
- April in Paris, about 2 minutes into the piece listen for damper “thumping”. If there is excess damper noise, slightly decrease the actuate distance of the LP solenoid and run LPCAL procedure again.
FINAL STEP: Adjust the sustain pedal rod nuts so that there is about 1-2mm of lost motion between the foot powered sustain dowel and the damper tray. This is to ensure that the damper tray is resting on the solenoid-powered dowel and not the foot-powered dowel. The lost motion should be adjusted such that a pianist will not notice it.
Notes: LPCAL must be re-run after each adjustment to the release stop disk position. This is necessary to ensure that the pedal positions measured by LPCAL and stored in memory are in exact agreement with the actual mechanical adjustment. If LPCAL is not re-run after adjusting the release stop disk, the pedaling will be incorrect.
LPCAL Utility may fail if the actuate distance is 6 mm or more. If such a failure occurs, the red LED on the sensor/status panel will illuminate and the system will remain inoperable until it has been power cycled. Shut off the power and reduce the solenoid travel (by rotating the release stop disk clockwise) before restarting LPCAL.